
Today I’m going to share an Android SQLite transaction example that I consider as one of the most useful test I made with Android SQLite. I’m really excited to share this since it helped me a lot and maybe it can help some more people as well.
This post will cover the following contents:
1.0 The Back Story
2.0 Insert Speed Problem
3.0 Android SQLite Transaction Example Source Code
4.0 Application Code Output
5.0 Other Tips On Improving Insert Speed
1.0 The Back Story
Recently, my app was required to download 30,000 records during sync. I think that’s a lot of data for a phone app, but that’s the way our app is.
The data were from a URL with data in JSON format. Our Android app has to read, parse and store the data on the device SQLite database.
30,000 records in one URL load is not advisable, we did several tests. I tried to parse it but failed, memory leaks occur, sometimes it was an out of memory error. So I tried some more test until I found the correct number of records per URL. 7,000 records and our app was able to read and parse it all. But to be safer, I made it to 5,000 records per page.
We had to paginate the download, so in our case, we had 6 pages. 6 pages x 5,000 records = 30,000. So yeah, it was very effective. All records were downloaded and inserted to the device SQLite database.
2.0 Insert Speed Problem
But before we were able to efficiently insert the records to the database, we run into the problem of “insert speed”. The usual insert command in Android is slow, so we had to use a transaction and prepared statement.
In our case, we use INSERT OR REPLACE INTO on the insert query since we want to update a row if it already exists, based on the trigger (INDEX) created.
If you’re using INSERT OR REPLACE INTO command, you have to create a trigger. This SQL trigger is executed after the table has been created (see DatabaseHandler.java below)
Another important factor in speeding up your insert is using prepared statements.
3.0 Android SQLite Transaction Example Source Code
Our source code will have three main files, the MainActivity.java, DatabaseHandler.java and activity_main.xml. I made the code as simple as possible for this example to be clear and easy to follow.
MainActivity.java – our program’s first run, it also contains the AsyncTask that will be executed when the user clicks a button.
package com.example.androidsqlitetransaction;

import android.os.AsyncTask;
import android.os.Bundle;
import android.app.Activity;
import android.view.View;
import android.widget.EditText;
import android.widget.TextView;

public class MainActivity extends Activity {

    final String TAG = "MainActivity.java";
    EditText editTextRecordNum;
    TextView tvStatus;

    @Override
    protected void onCreate(Bundle savedInstanceState) {

        super.onCreate(savedInstanceState);
        setContentView(R.layout.activity_main);

        View.OnClickListener handler = new View.OnClickListener() {
            public void onClick(View v) {

                switch (v.getId()) {

                case R.id.buttonNormalInsert:
                    new AsyncInsertData("normal").execute();
                    break;
                case R.id.buttonFastInsert:
                    new AsyncInsertData("fast").execute();
                    break;
                }
            }
        };

        // EditText for entering desired number of records to be inserted
        editTextRecordNum = (EditText) findViewById(R.id.editTextRecordNum);

        // Button for normal and fast insert
        findViewById(R.id.buttonNormalInsert).setOnClickListener(handler);
        findViewById(R.id.buttonFastInsert).setOnClickListener(handler);

        // status TextView
        tvStatus = (TextView) findViewById(R.id.textViewStatus);

    }

    // we used AsyncTask so it won't block the UI thread during inserts.
    class AsyncInsertData extends AsyncTask<String, String, String> {

        DatabaseHandler databaseHandler;
        String type;
        long timeElapsed;

        protected AsyncInsertData(String type){
            this.type  = type;
            this.databaseHandler = new DatabaseHandler(MainActivity.this);
        }

        // @type - can be 'normal' or 'fast'
        @Override
        protected void onPreExecute() {
            super.onPreExecute();
            tvStatus.setText("Inserting " + editTextRecordNum.getText() + " records...");
        }

        @Override
        protected String doInBackground(String... aurl) {

            try {

                // get number of records to be inserted
                int insertCount = Integer.parseInt(editTextRecordNum.getText().toString());

                // empty the table
                databaseHandler.deleteRecords();

                // keep track of execution time
                long lStartTime = System.nanoTime();

                if (type.equals("normal")) {
                    databaseHandler.insertNormal(insertCount);
                } else {
                    databaseHandler.insertFast(insertCount);
                }

                // execution finised
                long lEndTime = System.nanoTime();

                // display execution time
                timeElapsed = lEndTime - lStartTime;

            } catch (Exception e) {
                e.printStackTrace();
            }
            return null;
        }

        protected void onPostExecute(String unused) {
            tvStatus.setText("Done inserting " + databaseHandler.countRecords() + " records. Time elapsed: " + timeElapsed / 1000000 + " ms.");
        }

    }
}
DatabaseHandler.java – handles the database operations such as table creation, emptying the database, counting database records and the inserting our data using a loop.
package com.example.androidsqlitetransaction;

import android.content.ContentValues;
import android.content.Context;
import android.database.Cursor;
import android.database.sqlite.SQLiteDatabase;
import android.database.sqlite.SQLiteOpenHelper;
import android.database.sqlite.SQLiteStatement;
import android.util.Log;

public class DatabaseHandler extends SQLiteOpenHelper {

    // for our logs
    public static final String TAG = "DatabaseHandler.java";

    // database version
    private static final int DATABASE_VERSION = 7;

    // database name
    protected static final String DATABASE_NAME = "NinjaDatabase2";

    // table details
    public String tableName = "locations";
    public String fieldObjectId = "id";
    public String fieldObjectName = "name";
    public String fieldObjectDescription = "description";

    // constructor
    public DatabaseHandler(Context context) {
        super(context, DATABASE_NAME, null, DATABASE_VERSION);
    }

    // creating table
    @Override
    public void onCreate(SQLiteDatabase db) {

        String sql = "";

        sql += "CREATE TABLE " + tableName;
        sql += " ( ";
        sql += fieldObjectId + " INTEGER PRIMARY KEY AUTOINCREMENT, ";
        sql += fieldObjectName + " TEXT, ";
        sql += fieldObjectDescription + " TEXT ";
        sql += " ) ";

        db.execSQL(sql);

        // create the index for our INSERT OR REPLACE INTO statement.
        // this acts as the WHERE name="name input" AND description="description input"
        // if that WHERE clause is true, I mean, it finds the same name and description in the database,
        // it will be REPLACEd.
        // ELSE, what's in the database will remain and the input will be INSERTed (new record)
        String INDEX = "CREATE UNIQUE INDEX locations_index ON "
                        + tableName + " (name, description)";

        db.execSQL(INDEX);
    }


    // When upgrading the database, it will drop the current table and recreate.
    @Override
    public void onUpgrade(SQLiteDatabase db, int oldVersion, int newVersion) {

        String sql = "DROP TABLE IF EXISTS " + tableName;
        db.execSQL(sql);

        onCreate(db);
    }

    // insert data using transaction and prepared statement
    public void insertFast(int insertCount) {

        // you can use INSERT only
        String sql = "INSERT OR REPLACE INTO " + tableName + " ( name, description ) VALUES ( ?, ? )";

        SQLiteDatabase db = this.getWritableDatabase();

        /*
         * According to the docs http://developer.android.com/reference/android/database/sqlite/SQLiteDatabase.html
         * Writers should use beginTransactionNonExclusive() or beginTransactionWithListenerNonExclusive(SQLiteTransactionListener)
         * to start a transaction. Non-exclusive mode allows database file to be in readable by other threads executing queries.
         */
        db.beginTransactionNonExclusive();
        // db.beginTransaction();

        SQLiteStatement stmt = db.compileStatement(sql);

        for(int x=1; x<=insertCount; x++){

            stmt.bindString(1, "Name # " + x);
            stmt.bindString(2, "Description # " + x);

            stmt.execute();
            stmt.clearBindings();

        }

        db.setTransactionSuccessful();
        db.endTransaction();

        db.close();
    }

    // inserts the record without using transaction and prepare statement
    public void insertNormal(int insertCount){
        try{

            SQLiteDatabase db = this.getWritableDatabase();

            for(int x=1; x<=insertCount; x++){

                ContentValues values = new ContentValues();
                values.put(fieldObjectName, "Name # " + x);
                values.put(fieldObjectDescription, "Description # " + x);

                db.insert(tableName, null, values);

            }

            db.close();

        }catch(Exception e){
            e.printStackTrace();
        }
    }

    // deletes all records
    public void deleteRecords(){

        SQLiteDatabase db = this.getWritableDatabase();
        db.execSQL("delete from "+ tableName);
        db.close();
    }

    // count records
    public int countRecords(){

        SQLiteDatabase db = this.getWritableDatabase();

        Cursor cursor = db.rawQuery("SELECT count(*) from " + tableName, null);
        cursor.moveToFirst();

        int recCount = cursor.getInt(0);

        cursor.close();
        db.close();

        return recCount;
    }

}
activity_main.xml – the layout so we can enter the desired number of records to be inserted, choose whether we want it to be a ‘normal’ or ‘fast’ insert, and the status of the operation.
<RelativeLayout xmlns:android="http://schemas.android.com/apk/res/android"
    xmlns:tools="http://schemas.android.com/tools"
    android:layout_width="match_parent"
    android:layout_height="match_parent"
    android:paddingBottom="@dimen/activity_vertical_margin"
    android:paddingLeft="@dimen/activity_horizontal_margin"
    android:paddingRight="@dimen/activity_horizontal_margin"
    android:paddingTop="@dimen/activity_vertical_margin"
    tools:context=".MainActivity" >

    <EditText
        android:id="@+id/editTextRecordNum"
        android:layout_width="match_parent"
        android:layout_height="wrap_content"
        android:layout_alignParentLeft="true"
        android:layout_alignParentTop="true"
        android:inputType="number"
        android:singleLine="true"
        android:ems="10" >

        <requestFocus />
    </EditText>

    <Button
        android:id="@+id/buttonNormalInsert"
        android:layout_width="wrap_content"
        android:layout_height="wrap_content"
        android:layout_alignLeft="@+id/editTextRecordNum"
        android:layout_below="@+id/editTextRecordNum"
        android:text="Normal Insert" />

    <Button
        android:id="@+id/buttonFastInsert"
        android:layout_width="wrap_content"
        android:layout_height="wrap_content"
        android:layout_alignBaseline="@+id/buttonNormalInsert"
        android:layout_alignBottom="@+id/buttonNormalInsert"
        android:layout_toRightOf="@+id/buttonNormalInsert"
        android:text="Fast Insert" />

    <TextView
        android:id="@+id/textViewStatus"
        android:layout_width="wrap_content"
        android:layout_height="wrap_content"
        android:layout_alignLeft="@+id/buttonNormalInsert"
        android:layout_below="@+id/buttonNormalInsert"
        android:padding="10dp"
        android:text="Status" />

</RelativeLayout>
4.0 Android SQLite Transaction Example Code Output
See our code’s output screenshots below…
When you entered 1000 as number of records to be inserted and pressed either the “Normal Insert” or “Fast Insert” button.

After inserting 1000 the “Normal Insert” way.

After inserting 1000 the “Fast Insert” way.
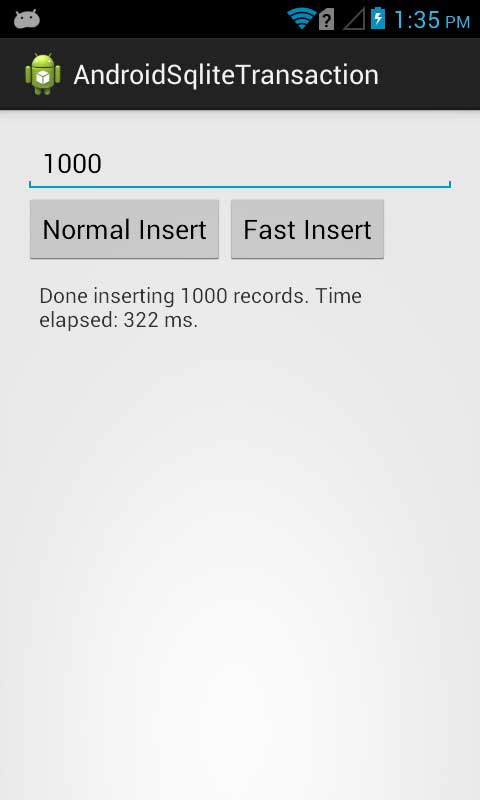
See the huge difference in insert speed? Inserting 1,000 records were from 54,615 milliseconds (almost 1 minute) down to 322 milliseconds!
5.0 Other Tips On Improving Insert Speed
Some other important points:
1. Do not put a “log” inside a loop, it affects the program execution and slows down the performance. For instance, Log.v(TAG, “Record was created.”); was inside a loop where you also insert the data.
2. Do not instantiate an object or class inside a loop, that’s the worst. The “new” keywords will slow down the performance. For instance, ValueConverter valueConverter = new ValueConverter(); will make you lonely for the rest of your life if it was inside a loop where you also insert the data.
If you have other thoughts or want to correct me, or something, please drop it in the comments section below. I’m willing to update this post for new information, ideas and tips that you can give. Thanks for reading this Android SQLite transaction example!
18 responses to “Android SQLite Transaction Example with INSERT Prepared Statement”
Great article! I’m dealing with a similar scenario where I need to save data coming from a service into SQLite db on app startup. The problem that I’m having with running the inserts in a background thread is configuration changes. Where do you open/close db connection when calling insertFast()? What would happen to a running query if activity gets destroyed? (Since activity is attached to an activity or context)
Hi @disqus_j7QIplsxrp:disqus, thanks man! Regarding the insertFast(), I think I open the database in SQLiteDatabase db = this.getWritableDatabase(); and thanks for pointing this out, I forgot to close the database, you can close it by adding db.close(); after the db.endTransaction();
I’m not sure what will happen to the query if the activity was suddenly destroyed. In PHP/MySQL, if there is a running query and the page was closed, the query still executes. In this case, I assume the query will still run since it was inside AsyncTask. I want to test it myself if I have the time, or you can share your own findings here. :)
I’m not sure what will happen to the query if the activity was suddenly destroyed?
Simple destroyed may be pressing the “Back Key” will let the query finish. but if the application process is killed then the query won’t get executed any further.
Nice tutorial. As mentioned by this http://www.tutorialspoint.com/sqlite/sqlite_indexes.htm
Indexes should be avoided for
Tables that have frequent, large batch update or insert operations.
Also shouldn’t these statements outside the for loop
stmt.execute();
stmt.clearBindings(); in DatabaseHandler
stmt.execute(); This is wrong according to documentation http://developer.android.com/reference/android/database/sqlite/SQLiteStatement.html#execute()
Execute this SQL statement, if it is not a SELECT / INSERT / DELETE / UPDATE, for example CREATE / DROP table, view, trigger, index etc.
But you are using INSERT!
Where is the database stored so I can see the records?
@disqus_TGp2H7PAxN:disqus you can try to use a code that imports you database to SD card directory and then use Firefox SQLite manager to see your database….
Why did you do this and why in the place it is at in AsyncInsertData? [this.databaseHandler = new DatabaseHandler(MainActivity.this);] Thank you in advance. I am trying to understand the Class and Context usage in the android environment.
@disqus_TGp2H7PAxN:disqus this is to be able to use the methods inside DatabaseHandler.java class, like deleteRecords(), insertNormal() and insertFast()
Hello Mike,
As you said that creating new object in loop is really a bad idea.
So how can we implement it, if a ArrayList of 1000 objects is to be formed with some class’s object.
I have same query
Thank you very much !
Can not explain how grateful I am.
Thanks.
No worries, you’re welcome @Ivan!
Thanks a lot man, great explanation!
Thanks for the kind words and you’re welcome @luizotavionunes:disqus!
Great tutorial
i have virtual table ,but i can not to index it .
how we can add index to it?