Hi there guys! Today I want to share with you a jQuery plugin that I made.
This jQuery plugin will enable your users to preview your web albums instantly.
My inspiration here is the Facebook albums, if you have a Facebook account (I’m sure you have, haha!) and wanted to view the list of albums, you can experience this functionality:
For me, the above is a very simple Facebook feature and yet, it’s awesome. It is very convenient for a user to have an album preview just by doing a hover.
Here’s our index.html code:
<html>
    <head>
        <title>FB Album Preview jQuery Plugin by https://codeofaninja.com/</title>
        <!– add some styles –>
        <link rel=‘stylesheet’ type=‘text/css’ href=‘css/style.css’ />

    </head>
<body>

<h3>
    Demo of FB Album Preview jQuery Plugin by <a href=‘https://codeofaninja.com/’>The Code Of A Ninja</a>
</h3>


<!– -You can generate all these HTML and JS codes using your server side script -The number of photos or thumbnails to be previewed depends on you –>

<div id=‘mainContent’>

    <!– album # 1 –>

<div class=‘albumDetails’>

<div class=“fbAlbum”>
            <!– the first image is the album cover photo –>
            <img class=“active” src=“images/1.jpg” />
            <img src=“images/2.jpg” />
            <img src=“images/3.jpg” />
            <img src=“images/4.jpg” />
            <img src=“images/5.jpg” />
        </div>


<div class=‘albumTitle’><a href=”>Profile Picture</a></div>


<div class=‘photosNum’>5 photos</div>

    </div>


    <!– album # 2 –>

<div class=‘albumDetails’>

<div class=“fbAlbum”>
            <!– the first image is the album cover photo –>
            <img class=“active” src=“images/6.jpg” />
            <img src=“images/7.jpg” />
            <img src=“images/8.jpg” />
        </div>


<div class=‘albumTitle’><a href=”>Mobile Uploads</a></div>


<div class=‘photosNum’>3 photos</div>

    </div>


    <!– album # 3 –>

<div class=‘albumDetails’>

<div class=“fbAlbum”>
            <!– the first image is the album cover photo –>
            <img class=“active” src=“images/9.jpg” />
            <img src=“images/10.jpg” />
            <img src=“images/11.jpg” />
            <img src=“images/12.jpg” />
        </div>


<div class=‘albumTitle’><a href=”>Wall Photos</a></div>


<div class=‘photosNum’>4 photos</div>

    </div>


</div>


<!– include jQuery library and our FB album preview plugin –>
<script src=“js/jquery.min.js”></script>
<script src=“js/fb.album.preview.js”></script>

<!– this is how we’re gonna use the plugin –>
<script type=‘text/javascript’>
$(document).ready(function(){
    // since all albums images container are under the class ‘fbAlbum’,
    // that’s what we are gonna user as the selector
    $(‘.fbAlbum’).FbAlbumPreview();
});
</script>

</body>
</html>
Customization code: Yes, you can supply values to customize the view and fade speed effect of this plugin. The default is viewSpeed = 1000 and fadeSpeed = 500. viewSpeed should always be greater than fadeSpeed.
viewSpeed – refers to how long the user can take a look at the thumbnail image.
fadeSpeed – how long the transition (fade effect) from one image to another will take place
Facebook Album Preview jQuery plugin Code(compressed)
/*FbAlbumPreview jQuery Plugin by Mike Dalisay - https://codeofaninja.com/ */
(function(a) {
    a.fn.FbAlbumPreview = function(b) {
        var c = a.extend({
            viewSpeed: 1e3,
            fadeSpeed: 500
        }, b);
        return this.each(function() {
            var b;
            var d = c.fadeSpeed;
            var e = false;
            a(this).hover(function() {
                var f = a(this);
                b = setInterval(function() {
                    f.find("IMG").show();
                    var a = f.find("IMG.active");
                    if (a.length == 0) {
                        a = f.find("IMG:last")
                    }
                    var b = a.next().length ? a.next() : f.find("IMG:first");
                    a.addClass("last-active");
                    b.css({
                        opacity: 0
                    }).addClass("active").animate({
                        opacity: 1
                    }, d, function() {
                        a.removeClass("active last-active");
                        e = true
                    })
                }, c.viewSpeed)
            }, function() {
                clearInterval(b);
                if (e == true) {
                    var c = a(this);
                    c.find("img").hide();
                    c.find("IMG.active").removeClass("active");
                    var f = c.find("IMG:first").fadeOut(d).fadeIn(d).addClass("active");
                    e = false
                }
            })
        })
    }
})(jQuery)
Download Source Codes
You can download all the code used in this tutorial for only $9.99 $5.55! [purchase_link id="12291" text="Download Now" style="button" color="green"]
Related Tutorials
We listed all our high quality full-stack web development tutorials here: Click here.
Thank you for learning from our post about FbAlbumPreview jQuery Plugin.
https://i0.wp.com/www.codeofaninja.com/wp-content/uploads/2013/03/jquery-tutorial-w-btn.jpg?fit=1200%2C628&ssl=16281200Mike Dalisayhttps://www.codeofaninja.com/wp-content/uploads/2019/03/codeofaninja-with-text-3-1030x206.pngMike Dalisay2012-09-30 14:25:002021-12-02 18:26:40Facebook Album Preview jQuery Plugin
<html>
    <head>
        <title>Div to Form – https://codeofaninja.com/</title>
        <!–just to include some styles –>
        <link rel="stylesheet" type="text/css" href="css/style.css" />
    </head>
<body>
<div id='banner'>
    <h2>Code of a Ninja Programming Blog</h2>
    <div>Converting a div to an editable HTML form and save changes to database</div>
</div>

<?php
//just getting the id of the user to be edited
$id = $_REQUEST['id'];

//connect to database
include 'libs/db_connect.php';

try {

    //prepare query
    $query = "select id, firstname, lastname, gender from users where id = ? limit 0,1″;
    $stmt = $con->prepare( $query );

    //this is the first question mark on the query above
    $stmt->bindParam(1, $id);

    //execute our query
    $stmt->execute();

    //store retrieved row to $row variable
    $row = $stmt->fetch(PDO::FETCH_ASSOC);

    //values to fill up our form
    $firstname = $row['firstname'];
    $lastname = $row['lastname'];
    $gender = $row['gender'];

}catch(PDOException $exception){ //to handle error
    echo "Error: " . $exception->getMessage();
}

?>
<!–start of our form –>
<form id='user_form'>

<!–id field is hidden, this is used to identify what row is to be edited–>
<input type='hidden' value='<?php echo $id; ?>' name='id'/>

<!–
    -just a form made with divs
    -when this div was clicked, it will be a form
–>
<div id='form_div'>

    <div class='field'>
        <div class='field_lbl'>Firstname:</div> <!–field name divs –>
        <div class='field_val'>
            <div class='field_div'>
                <!–
                    -this shown on page load
                    -and is hidden when the form_div was clicked
                    -and will be shown again when the user clicked anywhere outside the form_div or cancel button
                –>
                <div id='firstname_text'><?php echo $firstname; ?></div>
            </div>
            <div class='field_input'>
                <!–
                    -this is hidden on page load
                    -and is shown when form_div was clicked
                    -and will be hidden again when the user clicked anywhere outside the form_div or cancel button
                –>
                <input type='text' value='<?php echo $firstname; ?>' name='firstname' id='firstname'/>
            </div>
            <div class='clear_fix'></div>
        </div>
        <div class='clear_fix'></div>
    </div>
    <div class='clear_fix'></div>

    <!–same explanation above are given to these next fields–>
    <div class='field'>
        <div class='field_lbl'>Lastname:</div>
        <div class='field_val'>
            <div class='field_div'>
                <div id='lastname_text'><?php echo $lastname; ?></div>
            </div>
            <div class='field_input'><input type='text' value='<?php echo $lastname; ?>' name='lastname' id='lastname' /></div>
            <div class='clear_fix'></div>
        </div>
        <div class='clear_fix'></div>
    </div>
    <div class='clear_fix'></div>

    <div class='field'>
        <div class='field_lbl'>Gender:</div>
        <div class='field_val'>
            <div class='field_div'>
                <div id='gender_text'><?php echo $gender; ?></div>
            </div>
            <div class='field_input'>
                <select name='gender' id='gender'>
                    <option <?php if($gender == "Male") echo "selected";  ?> >Male</option>
                    <option <?php if($gender == "Female") echo "selected";  ?>>Female</option>
                </select>
            </div>
            <div class='clear_fix'></div>
        </div>
        <div class='clear_fix'></div>
    </div>
    <div class='clear_fix'></div>

    <!–
    -these buttons are hidden on page load
    -they are shown when form_div was clicked
    -and will be hidden again when the user clicked anywhere outside the form_div or cancel button
    —>
    <div class='btns'>
        <input type='button' value='Save' id='save_btn' />
        <input type='button' value='Cancel' id='cancel_btn' />
    </div>

</div>

</form>

<script src="js/jquery.min.js "></script>
<script type='text/javascript'>
$( document ).ready( function(){

    enable_hover(); //hover effect is enabled on page load

    $('#form_div').click(function(){
        edit_mode();
    });

    //when clicked the cancel button
    $('body').on('click', '#cancel_btn', function(){
        normal_mode(); //back to normal mode
    });

    //we used the jquery delegate func for live events
    $('body').on('click', '#save_btn', function(){

        //save first here
        //get the current values
        var fn = $('#firstname').val();
        var ln = $('#lastname').val();
        var gender = $('#gender').val();

        //the make it appear in the UI
        $('#firstname_text').text(fn);
        $('#lastname_text').text(ln);
        $('#gender_text').text(gender);

        //save the actual data
        //we use jquery serialize to serialize the form and easily get the form values
        //this is how to submit or post form without page refresh
        $.post("save.php",
            $("#user_form").serialize(),
            function(data) {
                //you can do any event you want here
                alert(data); //alert that the date were saved
                normal_mode(); //back to normal mode
            });

    });

    //this way we can detect if the user clicked outside the form_div area
    $("body").click(function(e) {
        if (e.target.id == "form_div" || $(e.target).parents("#form_div").size()) {
            //if clicked inside form_div area,
            //do nothing
        } else {
            //if the user clicked outside the form_div area,
            //we'll be in normal mode
            normal_mode();
        }
    });


});

function edit_mode(){

    $('#form_div').css({ 'background-color' : '#fff' }); //just make a white background
    $('#form_div').unbind('hover'); //disable hover

    $('.field_div').hide(); //hide the text
    $('.field_input').show(); //show the form element
    $('.btns').show(); //show the buttons

}

//the normal state is the appearance of the page/element when it was first loaded
function normal_mode(){
    enable_hover(); //enable the hover effect again
    $('.field_div').show(); //show the texts
    $('.field_input').hide(); //hide the input elements
    $('.btns').hide(); //hide the buttons
}

//hover effect is used when NOT in 'edit form' mode
//we unbind this effect when we are in the 'edit form' mode
function enable_hover(){
    $('#form_div').hover(
        function(){ //when we hover form_div, bg will be gray with a bit of rounded corners
            $(this).css({
                    'background-color' : '#dcdcdc',
                    '-moz-border-radius' : '5px',
                    'border-radius' : '5px'
                    });
        },
        function(){ //when mouse is not hovered, bg will be transparent
            $(this).css({'background-color' : 'transparent'});
        }
    );
}
</script>

</body>
</html>
our save.php code:
<?php
//this is where the data were updated/saved
//connect to database
include 'libs/db_connect.php';

try{

    //write query
    //in this case, it seemed like we have so many fields to pass and
    //its kinda better if we'll label them and not use question marks
    //like what we used here
    $query = "update
                users
            set
                firstname = :firstname,
                lastname = :lastname,
                gender = :gender
            where id = :id";

    //prepare query for excecution
    $stmt = $con->prepare($query);

    //bind the parameters
    $stmt->bindParam(':firstname', $_POST['firstname']);
    $stmt->bindParam(':lastname', $_POST['lastname']);
    $stmt->bindParam(':gender', $_POST['gender']);
    $stmt->bindParam(':id', $_POST['id']);

    // Execute the query
    if( $stmt->execute() ){
        echo "Record was updated.";

    }else{
        echo "Unable to update record.";
    }

}catch(PDOException $exception){ //to handle error
    echo "Error: " . $exception->getMessage();
}
?>
Thank you guys for your kind comments, messages and suggestions. I really appreciate it!
Download Source Code
You can download all the code used in this tutorial for only $9.99 $5.55! [purchase_link id="12303" text="Download Now" style="button" color="green"]
Related Tutorials
We listed all our high quality full-stack web development tutorials here: Click here.
Thank you for learning from our post about Convert a DIV Area to an Editable HTML Form.
https://i0.wp.com/www.codeofaninja.com/wp-content/uploads/2013/03/jquery-tutorial-w-btn.jpg?fit=1200%2C628&ssl=16281200Mike Dalisayhttps://www.codeofaninja.com/wp-content/uploads/2019/03/codeofaninja-with-text-3-1030x206.pngMike Dalisay2012-07-22 02:40:002021-07-25 14:11:39Convert a DIV Area to an Editable HTML Form
Hi guys! I like the Google+ notification box and lately I wondered how to code a notification box that look like something like that.
I love its simple design and box animation with easing.
So I decided to create my own version.
Today we are going to do a script that will look like the Google+ notification box. I was able to achieve this using jQuery, jQuery easing plugin and PHP.
The database I used (notifications.sql) is included in the code download. Here are the files I used:
css/style.css - stylesheet
img/ajax-loader.gif - loader image to show while loading the actual notification
js/jquery.easing.1.3.js - the plugin used for animation (easing)
js/jquery-1.7.1.min.js - our favorite JavaScript library (you can also use the google hosted)
config_open_db.php - connect to database
index.php - load the notification list and show/hide the box
item.php - load the actual notification
index.php code
<!DOCTYPE html>
<html>
<head>
<meta http-equiv="content-type" content="text/html; charset=UTF-8">
<title>Google plus style notification box</title>
<link rel="stylesheet" type="text/css" href="css/style.css" />
</head>
<body>
<div id='bar'>
<!-- show_notifications when clicked, will show or hide the notification box with fade effect -->
<div id='show_notifications'>Notifications</div>
<div style='clear:both;'></div>
<!-- wrapper is the notification box -->
<div id="wrapper">
<!-- div1 will hold the notification list -->
<div class="full" id="div1">
<div id='box_header'>
<div id='noti_text'>Notifications</div>
<!-- ajax loader was shown when a notification item was clicked -->
<div id='loader'><img src='img/ajax-loader.gif' /></div>
<div id='site_link'>
<a href='https://www.codeofaninja.com/'>+Code of a Ninja</a> ►
</div>
</div>
<div id='noti_list'>
<?php
// php code will be here
?>
</div>
<div id='box_footer'>
<!-- Change link this to your notifications page -->
<a href='https://www.codeofaninja.com/2012/03/goole-plus-style-notification-box.html?your-link-to-all-notifications/'>View all notifications</a> ►
</div>
</div>
<!-- div2 will hold the actual notification -->
<div class="full" id="div2">
<div id='box_header'>
<div id='noti_text'>◄ <a href='#'><span id='back_to_noti'>Back to Notifications</span></a></div>
<div id='site_link'>
<a href='https://www.codeofaninja.com/'>+Code of a Ninja</a> ►
</div>
</div>
<div id='actual_notification'>
<!-- Here is where the actual notification will be loaded -->
</div>
<div id='box_footer'>
<!-- Change link this to your notifications page -->
<a href='http://yourdomain.com/your-link-to-all-notifications/'>View all notifications</a> ►
</div>
</div>
</div>
</div>
<div style='margin-top:20px;'>
Click the "Notifications" button to show or hide the box.
</div>
<div style='margin-top:300px;'>
<a href='https://www.codeofaninja.com/2012/03/goole-plus-style-notification-box.html'>Tutorial Link Here</a>
</div>
<!-- javascript code will be here -->
</body>
</html>
PHP Code
Replace "PHP code will be here" line above with the following code.
//this will load the notifications in the database
include 'config_open_db.php';

//selecting record, you can use the limit clause here
//$_GET['owner_id'] is just an example user id passed via url
//you should use session variable here
$sql = "select * from notifications where owner_id = '" . $mysqli->real_escape_string( $_GET['owner_id'] ) . "'";

//query the database
$result = $mysqli->query( $sql );

//count how many records found
$num_results = mysqli_num_rows( $result );

if($num_results>0){ //check if more than 0 record found
    while( $row = $result->fetch_assoc()  ){
        extract($row);

        //display the notification item
        echo "<div class='noti_item'>";

            //noti_id will identify what notification item was clicked
            //which will be used to load the actual notification for the next screen
            echo "<div class='noti_id'>{$id}</div>";
            echo $notification;
        echo "</div>";
    }
}else{
    echo "No notification found.";
}
JavaScript Code
Replace "javascript code will be here" line above with the following code.
<!-- include the jQuery library and jQuery easing plugin -->
<script type='text/javascript' src="https://ajax.googleapis.com/ajax/libs/jquery/1.7.1/jquery.min.js"></script>
<script type='text/javascript' src="js/jquery.easing.1.3.js"></script>

<!-- this script will do the animations and loading actual notificaiton -->
<script type='text/javascript'>
$(window).load(function(){
    //show or hide the notification box
    $('#show_notifications').click(function(){
        $('#wrapper').fadeToggle();
    });

    //prepare/show #div2 on load
    $('#div2').css('left','440px').show();


    $('.noti_item').click(function(){

        //show the loader while waiting for the actual notificaiton to be loaded
        $('#loader').show();
        var noti_id = $(this).find('.noti_id').text();

        //item.php will load the actual notification based on the notification id
        $("#actual_notification").load("item.php?id=" + noti_id, function(){

            //after loading the actual notification,
            //hide the loader when the actual notification was loaded
            $('#loader').hide();

            //animate the box
            //hide #div1 (notification list)
            $('#div1').animate(
                { left: '-440px' },{
                    duration: '350',
                    easing: 'easeOutQuint'
            });

            //then show #div2(actual notification)
            $('#div2').animate(
                { left: 0 }, {
                    duration: '350',
                    easing: 'easeOutQuint'
            });

        });

    });

    //going back to notification list
    $('#back_to_noti').click(function(){

        //hide #div2 (actual notification)

        $('#div2').animate(
            { left: '440px' },{
                duration: '350',
                easing: 'easeOutQuint'
        });

        //then show #div1 (notification list)
        $('#div1').animate(
            { left: 0 }, {
                duration: '350',
                easing: 'easeOutQuint'
        });

        return false;
    });

});

</script>
item.php code
<?php
include 'config_open_db.php';

//selecting record
$sql = "select * from notifications where id = '" . $mysqli->real_escape_string( $_GET['id'] ) . "'";

//query the database
$result = $mysqli->query( $sql );

//count how many records found
$num_results = $result->num_rows;

if($num_results >0){ //check if more than 0 record found
    while( $row = $result->fetch_assoc() ){
        extract($row);
        echo "<div class='noti_indi'>";
            echo "<div class='noti_id'>{$id}</div>";
            echo $notification;
        echo "</div>";
    }
}else{
    echo "No notification found.";
}
?>
jQuery Quick Tip: This time I'm gonna show you how to redirect a page to another page or website when a user selected a value from a dropdown list and clicked a button.
We have two buttons here, the first one will redirect you to a website in the same page and the second one will redirect you in new tab (or window, in safari.)
Step 2: Put a drop down list of URLs you want your page to redirect.
<!--
  Here are our form elements,
  we have the select box / dropdown list
  which contains our URLs or links
-->
<select id="websites" style="width:200px;">
  <option value="http://demos.codeofaninja.com/tutorials/jQuery/get_dynamic_div_height.php">Get Dynamic</option>
  <option value="http://google.com">Google</option>
  <option value="https://codeofaninja.com">Blog</option>
  <option value="http://apple.com">Apple</option>
</select>
Step 3: Put the buttons for opening the URL in the same window or another window or tab.
<!--
  And our buttons, the first one is "Open In Same Window"
  which opens the link selected on the dropdown in the same window.

  The other button is the "Open In New Tab" which opens the link in
  new tab (or window in safari)
-->
<input type="button" value="Open In Same Window" id="open_same_window" />
<input type="button" value="Open In New Tab" id="open_new_tab" />
Step 4: Include jQuery library and basic jQuery code.
Step 5: Inside the basic jQuery code $(document).ready(function() {..., put the button click event triggers.
//this will be triggered when the first button was clicked
$("#open_same_window").click(function(){
  //this will find the selected website from the dropdown
  var go_to_url = $("#websites").find(":selected").val();

  //this will redirect us in same window
  document.location.href = go_to_url;
});

//this will be triggered when the second button was clicked
$("#open_new_tab").click(function(){
  //this will find the selected website from the dropdown
  var go_to_url = $("#websites").find(":selected").val();

  //this will redirect us in new tab
  window.open(go_to_url, '_blank');
});
Complete jQuery Redirect onClick Page
<html>
   <head>
      <title>jQuery Redirect OnClick</title>
   </head>
<body>

<div style="margin:200px 200px;">
   <!--
      Here are our form elements,
      we have the select box / dropdown list
      which contains our URLs or links
   -->
   <select id="websites" style="width:200px;">
      <option value="http://demos.codeofaninja.com/tutorials/jQuery/get_dynamic_div_height.php">Get Dynamic</option>
      <option value="http://google.com">Google</option>
      <option value="https://codeofaninja.com">Blog</option>
      <option value="http://apple.com">Apple</option>
   </select>

   <!--
      And our buttons, the first one is "Open In Same Window"
      which opens the link selected on the dropdown in the same window.

      The other button is the "Open In New Tab" which opens the link in
      new tab (or window in safari)
   -->
   <input type="button" value="Open In Same Window" id="open_same_window" />
   <input type="button" value="Open In New Tab" id="open_new_tab" />
</div>

<!-- include our library -->
<script src="https://ajax.googleapis.com/ajax/libs/jquery/1.7.1/jquery.min.js"></script>
<script type='text/javascript'>
$(document).ready(function() {

   //this will be triggered when the first button was clicked
   $("#open_same_window").click(function(){
      //this will find the selected website from the dropdown
      var go_to_url = $("#websites").find(":selected").val();

      //this will redirect us in same window
      document.location.href = go_to_url;
   });

   //this will be triggered when the second button was clicked
   $("#open_new_tab").click(function(){
      //this will find the selected website from the dropdown
      var go_to_url = $("#websites").find(":selected").val();

      //this will redirect us in new tab
      window.open(go_to_url, '_blank');
   });

});
</script>

</body>
</html>
Redirecting a page using JavaScript is fun. If you have any other techniques of doing this jQuery redirect onClick event, please drop it in the comments section below! Thanks!
Download Source Code You can download all the code used in this tutorial for only $9.99 $5.55! [purchase_link id="12260" text="Download Now" style="button" color="green"]
Related Tutorials
We listed all our high quality full-stack web development tutorials here: Click here.
Thank you for learning from our post about jQuery Redirect onClick Event (New or Same Window)!
https://i0.wp.com/www.codeofaninja.com/wp-content/uploads/2013/03/jquery-tutorial-w-btn.jpg?fit=1200%2C628&ssl=16281200Mike Dalisayhttps://www.codeofaninja.com/wp-content/uploads/2019/03/codeofaninja-with-text-3-1030x206.pngMike Dalisay2012-01-18 22:19:002021-07-25 15:52:20jQuery Redirect onClick Event (New or Same Window)
I’m going to show you how to get DIV height in JavaScript.
I was in a situation when I have to animate a div by maintaining/grabbing/pausing its current height first but its height is not specified in the CSS and is dynamic.
Anyway, this tutorial will focus on how to get the dynamic div’s height.
<html>
    <head>
        <title>jquery get dynamic div height</title>
        <!– just some styles –>
        <style type=‘text/css’>
        #div_1{
           width:150px;
            border:thin solid red;
            float:left;
        }
        .btn{
            padding:10px;
        }
        </style>
    </head>
<body>

<!– the div with some contents in which we will get the height –>
<div id=‘div_1′>
Lorem ipsum dolor sit amet, consectetur adipiscing elit. Duis
dapibus, mauris ac feugiat bibendum.
</div>

<!– onClick of this button, some text will be added and display the div_1 height –>
<input type=‘button’ class=‘btn’ id=‘add_text’ value=‘Add Text and Get New Height’ />

<!– This will display the current height –>
<div id=‘result’></div>

<script src=“https://ajax.googleapis.com/ajax/libs/jquery/1.7.1/jquery.min.js”>
</script>
<script type=‘text/javascript’>
$(document).ready(function() {
    //load the current height
    get_div_height();

    $(“#add_text”).click(function(){
        //append the some text to change current height
        $(“#div_1″).append(“The Code of a Ninja.”);

        //load the new height
        get_div_height();
    });

    //function to get current div_1 height
    function get_div_height(){
        var div_height = $(“#div_1″).height();
        $(“#result”).html(“div height is: “ + div_height + ” px”);
    }

});
</script>

</body>
</html>
You can also get your browser’s current window height by doing:
$(window).height()
and your document’s height (height of html document) by:
https://www.codeofaninja.com/wp-content/uploads/2019/03/codeofaninja-with-text-3-1030x206.png00Mike Dalisayhttps://www.codeofaninja.com/wp-content/uploads/2019/03/codeofaninja-with-text-3-1030x206.pngMike Dalisay2012-01-17 16:13:002021-12-02 21:43:27Get DIV height in JavaScript
Hi there! Today we are going to do a very simple yet useful script for your web apps.
A jQuery AJAX pagination with the help of a PHP pagination class. This is very easy to use and integrate with your project.
This code will load the paginated data via AJAX, we’ll have some loader image to make it look good and user friendly.
Paginated data was returned by our PHP script with the help of a Modified PS_Pagination Class (Yes, I modified it myself since I want to use this Awesome pagination class with jQuery.)
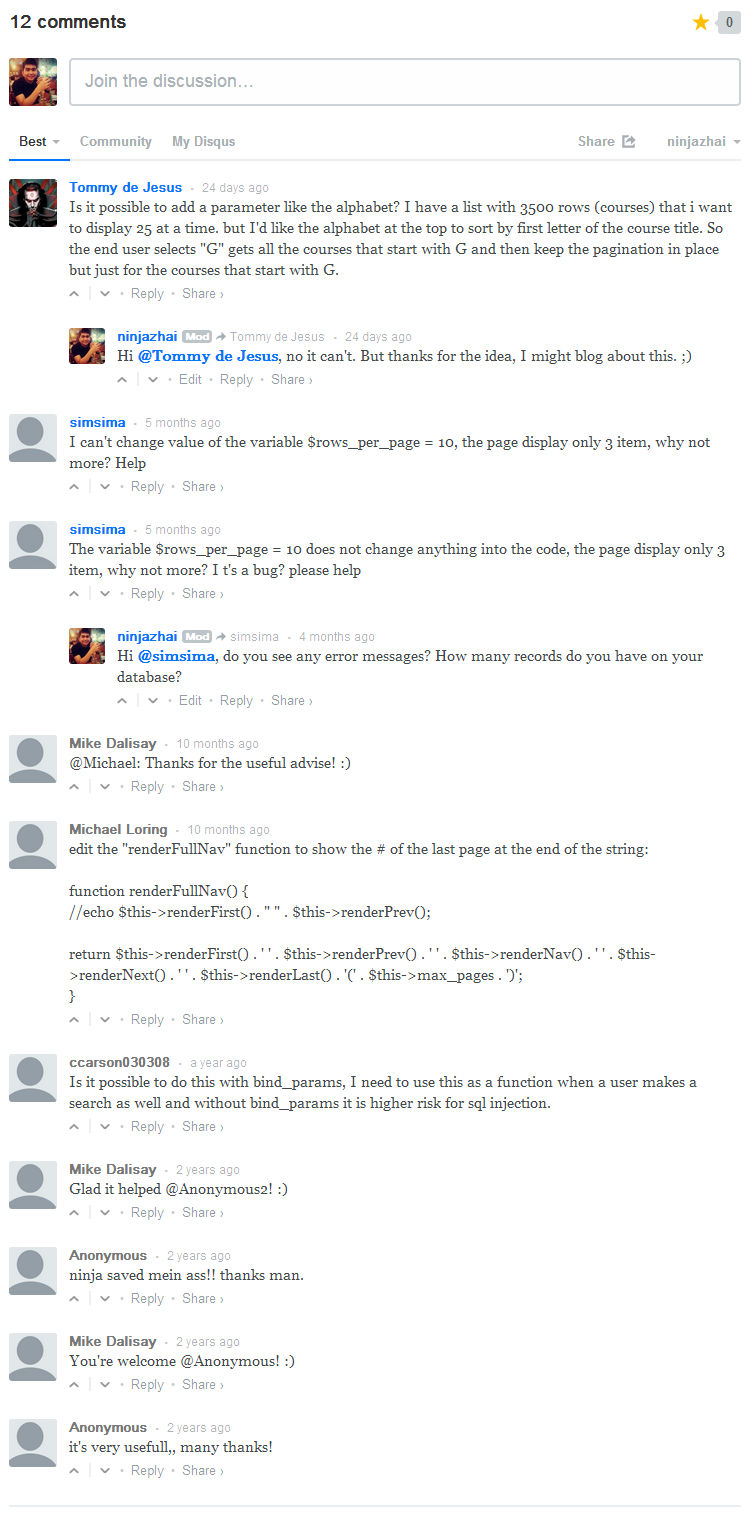
We are going to have the following files for today’s code: 1. images/ajax-loader.gif – for our loader animation 2. js/jquery-1.4.js – our favorite javascript library 3. libs/ps_pagination.php – the pagination class I modified 4. styles/style.css – style for our table data and page number navigation 5. db_connect.php – for database connection 6. index.php – our main UI 7. search_results.php – returns the data that will be displayed to index.php
Prepare our database table and data.
We’re gonna use the following sample table structure and data.
Our user interface will be represented by our index.php file.
<!DOCTYPE HTML>
<html>
    <head>
        <title>jQuery AJAX and PHP Pagination Demo - codeofaninja.com</title>

        <!-- Include custom CSS. -->
        <link rel="stylesheet" type="text/css" href="styles/style.css" />

    </head>
<body>

<div id='retrieved-data' style='height:15em;'>
    <!--
    This is where data will be shown.
    -->
    <img src="images/ajax-loader.gif" />
</div>

<script type = "text/javascript" src = "js/jquery-1.7.1.min.js"></script>
<script type = "text/javascript">
$(function(){
    // show the first page
    getdata(1);
});

function getdata(pageno){
    // source of data
    var targetURL = 'search_results.php?page=' + pageno;

    // show loading animation
    $('#retrieved-data').html('<img src="images/ajax-loader.gif" />');

    // load to show new data
    $('#retrieved-data').load(targetURL).hide().fadeIn('slow');
}
</script>

</body>
</html>
Getting the page data
This will be the code inside our search_results.php file, where our modified pagination class was used.
<?php
// Connect to database.
include 'db_connect.php';
// Include our pagination class / library.
include 'libs/ps_pagination.php';
// Query all data anyway you want
$sql = "select * from users ORDER BY firstname DESC";
/*
Now, we are going to use our pagination class.
This is a significant part of our pagination.
I will explain the PS_Pagination parameters:
> $conn is a variable from our config_open_db.php
> $sql is our sql statement above
> 3 is the number of records retrieved per page
> 4 is the number of page numbers rendered below
> null - We used null because we don't have any other parameters to pass
(i.e. param1=valu1¶m2=value2)
You can use this if you are going to use this class for search results.
The last parameter is useful because you will have to pass the search keywords.
*/
$pager = new PS_Pagination($conn, $sql, 3, 4, null);
// Our pagination class will render new recordset.
// Search results now are limited for pagination.
$rs = $pager->paginate();
// Count how many rows of data were returned.
$num = $rs->rowCount();
if($num >= 1 ){
// Create our table header
echo "<table id='my-tbl'>";
echo "<tr>";
echo "<th>Firstname</th>";
echo "<th>Lastname</th>";
echo "<th>Email</th>";
echo "</tr>";
// Loop through the records retrieved
while ($row = $rs->fetch(PDO::FETCH_ASSOC)){
echo "<tr class='data-tr' align='center'>";
echo "<td>{$row['firstname']}</td>";
echo "<td>{$row['lastname']}</td>";
echo "<td>{$row['email']}</td>";
echo "</tr>";
}
echo "</table>";
}else{
// If no records found
echo "No records found!";
}
// 'page-nav' CSS class is used to control the appearance of our page number navigation
echo "<div class='page-nav'>";
// Display our page number navigation
echo $pager->renderFullNav();
echo "</div>";
?>
Modified PS_Pagination Class
The previous section will not work without the PS_Pagination class we modified. Create "libs" folder. Open "libs" folder. Create ps_pagination.php file. Put the following code inside it.
<?php
/**
* PHPSense Pagination Class
*
* PHP tutorials and scripts
*
* @package PHPSense
* @author Jatinder Singh Thind
* @copyright Copyright (c) 2006, Jatinder Singh Thind
* @link http://www.phpsense.com
* @modification Mike Dalisay
* @link https://www.codeofaninja.com
*/
// ------------------------------------------------------------------------
class PS_Pagination {
var $php_self;
var $rows_per_page = 10; //Number of records to display per page
var $total_rows = 0; //Total number of rows returned by the query
var $links_per_page = 5; //Number of links to display per page
var $append = ""; //Paremeters to append to pagination links
var $sql = "";
var $debug = false;
var $conn = false;
var $page = 1;
var $max_pages = 0;
var $offset = 0;
/**
* Constructor
*
* @param resource $connection Mysql connection link
* @param string $sql SQL query to paginate. Example : SELECT * FROM users
* @param integer $rows_per_page Number of records to display per page. Defaults to 10
* @param integer $links_per_page Number of links to display per page. Defaults to 5
* @param string $append Parameters to be appended to pagination links
*/
function PS_Pagination($connection, $sql, $rows_per_page = 10, $links_per_page = 5, $append = "") {
$this->conn = $connection;
$this->sql = $sql;
$this->rows_per_page = (int)$rows_per_page;
if (intval($links_per_page ) > 0) {
$this->links_per_page = (int)$links_per_page;
} else {
$this->links_per_page = 5;
}
$this->append = $append;
$this->php_self = htmlspecialchars($_SERVER['PHP_SELF'] );
if (isset($_GET['page'] )) {
$this->page = intval($_GET['page'] );
}
}
/**
* Executes the SQL query and initializes internal variables
*
* @access public
* @return resource
*/
function paginate() {
//Check for valid mysql connection
//Find total number of rows
$all_rs = $this->conn->prepare( $this->sql );
$all_rs->execute();
if (! $all_rs) {
if ($this->debug)
echo "SQL query failed. Check your query.<br /><br />Error Returned: " . mysql_error();
return false;
}
$this->total_rows = $all_rs->rowCount();
//Return FALSE if no rows found
if ($this->total_rows == 0) {
if ($this->debug)
echo "Query returned zero rows.";
return FALSE;
}
//Max number of pages
$this->max_pages = ceil($this->total_rows / $this->rows_per_page );
if ($this->links_per_page > $this->max_pages) {
$this->links_per_page = $this->max_pages;
}
//Check the page value just in case someone is trying to input an aribitrary value
if ($this->page > $this->max_pages || $this->page <= 0) {
$this->page = 1;
}
//Calculate Offset
$this->offset = $this->rows_per_page * ($this->page - 1);
//Fetch the required result set
$query = $this->sql . " LIMIT {$this->offset}, {$this->rows_per_page}";
$rs = $this->conn->prepare( $query );
$rs->execute();
if (! $rs) {
if ($this->debug)
echo "Pagination query failed. Check your query.<br /><br />Error Returned: " . mysql_error();
return false;
}
return $rs;
}
/**
* Display the link to the first page
*
* @access public
* @param string $tag Text string to be displayed as the link. Defaults to 'First'
* @return string
*/
function renderFirst($tag = 'First') {
if ($this->total_rows == 0)
return FALSE;
if ($this->page == 1) {
return "$tag ";
} else {
//return '<a href="' . $this->php_self . '?page=1&' . $this->append . '">' . $tag . '</a> ';
//default to one (1)
return " <a href='javascript:void(0);' OnClick='getdata( 1 )' title='First Page'>$tag</a> ";
}
}
/**
* Display the link to the last page
*
* @access public
* @param string $tag Text string to be displayed as the link. Defaults to 'Last'
* @return string
*/
function renderLast($tag = 'Last') {
if ($this->total_rows == 0)
return FALSE;
if ($this->page == $this->max_pages) {
return $tag;
} else {
//return ' <a href="' . $this->php_self . '?page=' . $this->max_pages . '&' . $this->append . '">' . $tag . '</a>';
$pageno = $this->max_pages;
return " <a href='javascript:void(0);' OnClick='getdata( $pageno )' title='Last Page'>$tag</a> ";
}
}
/**
* Display the next link
*
* @access public
* @param string $tag Text string to be displayed as the link. Defaults to '>>'
* @return string
*/
function renderNext($tag = '>>') {
if ($this->total_rows == 0)
return FALSE;
if ($this->page < $this->max_pages) {
//return '<a href="' . $this->php_self . '?page=' . ($this->page + 1) . '&' . $this->append . '" title=\'next to\'>' . $tag . '</a>';
$pageno = $this->page + 1;
return " <a href='javascript:void(0);' OnClick='getdata( $pageno )' title='Next Page'>$tag</a> ";
} else {
return $tag;
}
}
/**
* Display the previous link
*
* @access public
* @param string $tag Text string to be displayed as the link. Defaults to '<<'
* @return string
*/
function renderPrev($tag = '<<') {
if ($this->total_rows == 0)
return FALSE;
if ($this->page > 1) {
//return ' <a href="' . $this->php_self . '?page=' . ($this->page - 1) . '&' . $this->append . '">' . $tag . '</a>';
$pageno = $this->page - 1;
return " <a href='javascript:void(0);' OnClick='getdata( $pageno )' title='Previous Page'>$tag</a> ";
} else {
return " $tag ";
}
}
/**
* Display the page links
*
* @access public
* @return string
*/
function renderNav($prefix = '<span class="page_link">', $suffix = '</span>') {
if ($this->total_rows == 0)
return FALSE;
$batch = ceil($this->page / $this->links_per_page );
$end = $batch * $this->links_per_page;
if ($end == $this->page) {
//$end = $end + $this->links_per_page - 1;
//$end = $end + ceil($this->links_per_page/2);
}
if ($end > $this->max_pages) {
$end = $this->max_pages;
}
$start = $end - $this->links_per_page + 1;
$links = '';
for($i = $start; $i <= $end; $i ++) {
if ($i == $this->page) {
$links .= $prefix . " $i " . $suffix;
} else {
//$links .= ' ' . $prefix . '<a href="' . $this->php_self . '?page=' . $i . '&' . $this->append . '">' . $i . '</a>' . $suffix . ' ';
//$pageno = $this->page + 1;
$links .= " <a href='javascript:void(0);' OnClick='getdata( $i )' title='Another page'>$i</a> ";
}
}
return $links;
}
/**
* Display full pagination navigation
*
* @access public
* @return string
*/
function renderFullNav() {
//echo $this->renderFirst() . " " . $this->renderPrev();
return $this->renderFirst() . ' ' . $this->renderPrev() . ' ' . $this->renderNav() . ' ' . $this->renderNext() . ' ' . $this->renderLast();
}
/**
* Set debug mode
*
* @access public
* @param bool $debug Set to TRUE to enable debug messages
* @return void
*/
function setDebug($debug) {
$this->debug = $debug;
}
}
?>
Style page links
Style your page links, as for this tutorial, I used the following style.css:
https://i0.wp.com/www.codeofaninja.com/wp-content/uploads/2013/03/jquery-tutorial-w-btn.jpg?fit=1200%2C628&ssl=16281200Mike Dalisayhttps://www.codeofaninja.com/wp-content/uploads/2019/03/codeofaninja-with-text-3-1030x206.pngMike Dalisay2011-06-26 04:10:002021-07-26 10:32:46Simple jQuery AJAX Pagination with PHP and MySQL – Step By Step Guide!
Hi there developer! Today we are going to do a code snippet that:
Checks if a username is available or not (in the database).
If the username is available, the program will output “[your_username] is available!”
Then if it is not available, “Username already taken” will be printed.
This code also has a simple validation that states whether the inputted username is too short or is empty.
All those tasks will be performed via AJAX, so it is without page refresh. You can expand its validation though.
In this code, we need a sample data from the database table and four (4) files which includes: config_open_db.php, index.php, check.php and the jQuery library file.
database – you could have this table structure and data:
CREATE TABLE IF NOT EXISTS `users` (
  `id` int(11) NOT NULL AUTO_INCREMENT,
  `firstname` varchar(32) NOT NULL,
  `lastname` varchar(32) NOT NULL,
  `username` varchar(32) NOT NULL,
  `password` varchar(32) NOT NULL,
  PRIMARY KEY (`id`)
) ENGINE=InnoDB  DEFAULT CHARSET=latin1 AUTO_INCREMENT=3 ;

--
-- Dumping data for table `users`
--

INSERT INTO `users` (`id`, `firstname`, `lastname`, `username`, `password`) VALUES
(1, 'John', 'Doe', 'johnny', 'john'),
(2, 'Albert', 'Minston', 'albert', 'albert');
config_open_db.php – this file is for database connection so that we’ll be able to load usernames from the database. You should have something like this: (Please supply the variables with YOUR settings.)
<?php
$host = "localhost";
$db_name = "your_db_name";
$username = "your_db_username";
$password = "your_db_password";

//connect to mysql server
$mysqli = new mysqli($host, $username, $password, $db_name);

//check if any connection error was encountered
if(mysqli_connect_errno()) {
    echo "Error: Could not connect to database.";
    exit;
}
?>
index.php – this file makes our user interface for this tutorial. jQuery library is of course included in this file.
<html>
    <head>
        <title>Username checker and validator</title>
    </head>
<body>

<p>
    <div id = "feedback"></div>
    <form name = 'form'>
        <input type = 'text' id = 'username_input' name = 'username' >
    </form>(try 'johnny', 'albert', 'chris' or 'james')
</p>

<div class='back-link'>
    <a href='https://www.codeofaninja.com/2011/06/check-and-validate-username-without.html'>Back to tutorial page</a>
</div>

<script type = "text/javascript" src = "js/jQuery.js"></script>
<script type = "text/javascript">

    // when the document is ready, run the jquery script
    $(document).ready(function(){
        $('#feedback').load('check.php').show();

        /* We use keyup so that everytime the user type in the keyboard, it'll check the database and get results however,
          you can change this to a button click which is I think, more advisable.
          Sometimes, your server response is slow but just for this demo, we'll use 'keyup' */
        $('#username_input').keyup(function(){

            $.post('check.php', { username: form.username.value },
                function(result){
                    $('#feedback').html(result).show();
                });

        });
    });
</script>

</body>
</html>
check.php – this file makes the request to the database, to check the inputted value.
You can download all the code used in this tutorial for only $9.99 $5.55! [purchase_link id="12309" text="Download Now" style="button" color="green"]
Related Tutorials
We listed all our high quality full-stack web development tutorials here: Click here.
Thank you for learning from our post about Check and Validate Username in jQuery.
https://i0.wp.com/www.codeofaninja.com/wp-content/uploads/2013/03/jquery-tutorial-w-btn.jpg?fit=1200%2C628&ssl=16281200Mike Dalisayhttps://www.codeofaninja.com/wp-content/uploads/2019/03/codeofaninja-with-text-3-1030x206.pngMike Dalisay2011-06-23 16:58:002021-07-26 10:34:50Check and Validate Username in jQuery
Hi there! Well, I don't have much posts few weeks ago since I'm kinda busy working on a project. I got good news and not-so-bad news, haha! This past few weeks, I've been working on an Android application which makes me so happy (though at first, kinda stressed, since I'm a beginner on this). Yes, it has been my dream to be a Java programmer since college. I can't believe that now, one of my dreams is coming true (Since Android is Java based).
There's more :)
I can say that now, I'm comfortable with developing an Android application. It is total object oriented, powerful, has lots of possibilities, useful, extensible, and almost anything you can think of. It can be integrated with other technologies like Web App Development (which is also what I'm working on now). Most of all, it is continuously developed by increasing hundreds of thousands of other developers around the world (I'm happy and grateful to be one of them). Another great thing is that, there are over 400,000 Android devices were activated everyday.I'm gonna tell you something about my current project. The Android application is run in a tablet device (I have Samsung Galaxy Tab, Android Froyo for now. But I'm delighted by it.). The Android App I'm doing is some sort of a content management system that syncs data from an encrypted XML stream. Those data include images, slideshows, flash games, videos, audios, websites, survey forms, sales data, etc. The XML stream is of course generated dynamically by a Web based content management system which is developed with some web development technologies like HTML5, CakePHP and jQuery. Sounds simple right? But like any other software project, it will be from simple to complex. We will discover more about the client's business logic. The user of this application is in the retail industry. The Android App will be installed in tablet devices in different parts of the country (where they have market places).Here's the not-so-bad news: The web based CMS is developed by other programmer. And so now, it is assigned to be developed by me. So I got a lot of work to do. I thought I will concentrate on Android development, but it seemed like web app development always haunt me haha! Anyway the good news there is that, I'll have a lot of knowledge to share with you guys and of course the open-sourcecommunity.As of now, I'm the only programmer of this project. Good thing is I'm with a Systems Analyst who helps a lot. But the team will expand sooner or later. :)Just a piece of advice, to those who want to learn language frameworks such as CakePHP (for PHP) and jQuery (for JavaScript), you have to learn first its basic or native language: PHP and JavaScript. This will give you great development advantage. :)And oh, I got a late special announcement (or at-least for me), as you've noticed, you accessed this blog in a top level domain: https://www.codeofaninja.com which is before http://www.codeofaninja.blogspot.com. It's my dream to own a ".com" website before, and now, it just came true last June 2, 2011. I registered https://www.codeofaninja.com at Go Daddy.I'm also so happy to see that there are increasing number of traffic on this site (based on this blog's google analytics account). It makes my goal to help and share knowledge to other people in different parts of the world.


